Hello there fellow crafters!
What are the BS Sessions?
Well Samantha knows how to work a marker like nobody's business and Becca loves to get messy with mixed media. We both wanted to learn the other person's crafty secrets so we're going to ask one another a question on the last Thursday of the month. Becca will provide you with some amazing Mixed Media techniques and Samantha will show you some tips and tricks about coloring! We'll both provide our followers with a little tutorial, because if we have these questions - our followers might too!
So Becca's question to me this month was: "Do you need a blender pen, and what is it for?"
This is a tricky question, I would say you do not necessarily NEED a blender pen, but I highly recommend it as they do come in handy in certain situations! In my opinion there are three main uses for a blender pen.
I should note that, despite it's name, it is NOT used for blending! If you attempt to blend alcohol markers with this pen you will end up with a muddled, de-saturated mess. Why? Blender pens are pretty much straight alcohol. So, when you attempt to blend other colors with the blender pen, you are actually "removing" the color.
Onward to what you CAN actually do with this pen.
1. To color "white" things:
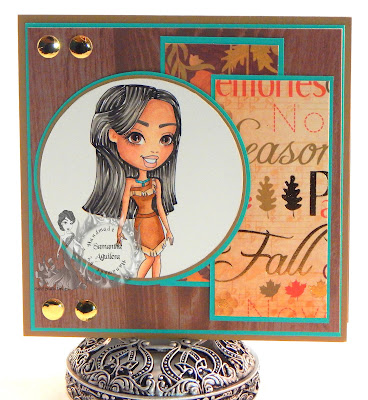
See how I left parts of her dress white? Well I used a combination of colors and used my lightest color to blend out the rest of the colors and then used my blender to go from the white area and just barely blend over the lightest color. In this case it was RV10, but in Spectrum Noir any of the "1's" to create the same effect. Unfortunately, I could not get a great picture to show you a before and after, so, don't take my word for it, TRY IT! :)
2. To create cool effects:
So, this doesn't happen often, for me at least, but there are those rare times where I can use this technique to create a neat effect on some clothing on an image. As you can see above you can do stripes, plaid, spots, dots, swirls, etc.
I also found this by Jennifer Dove and thought it'd be neat to share it!
3. To rectify a mistake:
There are those times when you accidentally go out the lines, and that's another handy reason to have a blender on hand. As I stated earlier, the blender pens "remove" color because it's basically pure alcohol. So the best way to do this (in my opinion) is to use the chisel nib and "push" the color back. Start with the chisel nib a little further back than your mistake and "drag" the color back to the line. Make sure you don't go INTO the image because it will remove that color too. The lighter the color, the easier and better results you get for "removing" the color. If you are trying to do a dark red or black you may not be able to get rid of the whole thing, but it will definitely lighten it up enough to where you barely notice it.
In this tutorial I am using Copics, but you can apply the techniques to ANY brand of marker!
**FINAL NOTE** - The blending cardstock you uses MATTERS! It makes a world of a difference in your coloring! My favorite is Heavenly White 80# Cardstock which is sold by
The Paper Temptress! Not sure what kind of blending carstock is right for you? NO PROBLEM! She offers a "
Blending Copic Sample Pack" Which allows you to test a variety of blending cardstocks so you can find YOUR favorite.
SO, thanks for joining me on the skin coloring tutorial today! Becca has provided an AWESOME mixed media tutorial on her blog - GO CHECK IT OUT!


