Crafty Gals Corner - Owner & DT Coordinator

Crafty Gals Corner - Owner & DT Coordinator
January 2015 - Current

Faery Ink DT

Faery Ink DT
January 2015 - Current

Conie Fong Art & Design Coordinator

Conie Fong Art & Design Coordinator
January 2016 - Current

MoonFlower DT

MoonFlower DT
March 2016 - October 2016

Paper Temptress DT

Paper Temptress DT
October 2015 - June 2016

Sassy Studio Designs FB Coodinator & DT

Sassy Studio Designs FB Coodinator & DT
April 2015 - February 2016

Ching Chou Kuik FB DT

Ching Chou Kuik FB DT
September 2015 - April 2016

GDT - April 2015

GDT - March & April 2015

Showing posts with label Other Crafts. Show all posts

Monday, January 18, 2016

Ching-Chou Kuik Inspiration!

Hello There!!

If you check out the Ching Chou Kuik FB Group, you'll see that I've shared an inspiration piece over there today as it is my turn on the DT rotation. The 2nd and 3rd Monday of every month you can see an inspirational piece from me!

The image I used is called On the Moon and you can find this image and MANY other fabulous images of at the Ching Chou Kuik Etsy shop.
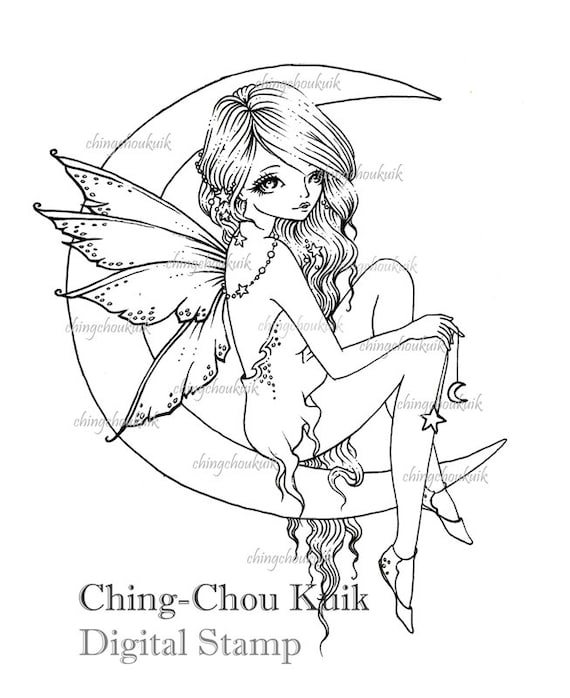


Here is what I created:


I don't often make tags, but this beauty inspired me! I used alcohol to create the drops in the purple background. I only had white tulle, so I add some metallic slate Perfect Pearls spray, and a little black acrylic paint. Let it dry and VIOLA - Black tulle. I have to mention that I got Ken Olive's Best Craft Mat for Christmas - and it is AMAZING! If you've been on the fence about it, BUY it! Clean up is easy, it holds everything in place. I just LOVE IT! I used it when fiddling around with the Tulle for this project.

Copic Colors Used - In order from lightest to darkest:

Skin: E04, E11, E21, E00, E000
Hair: W9, W7, W5, V99, V17, V01, YR24, YR23, YR21
Dress: V99, V09, V17, V15, V01
Wings: V99, V17, V15, V01
Moon: E15, YR24, YR23, YR20, YR000, Y000
Lips: E04
Eyes: BV23

Thanks for stopping by today and I hope you have a wonderful rest of the week!

Saturday, August 29, 2015

Ching Chou Kuik DT Inspiration!

Hello There!!

So if you follow my blog you would've seen that I applied for the Ching Chou Kuik Design Team and I'm so excited to announce that I MADE IT! 


The gals are so friendly, the images are stunning and Ching Chou Kuik is so sweet! I'm very lucky to be apart of such an amazing team!

If you check out the Ching Chou Kuik FB Group, you'll see that I've shared an inspiration piece as a  way of introducing my self.

This is the piece that I shared:


This image is called Red Panda and you can find this image and MANY other fabulous images of at the Ching Chou Kuik Etsy shop

This coloring technique is from a Create and Learn class from Kit & Clowder and is done with Spectrum Noir Pencils. What a fun class this was! I learned so many new techniques such as how color fur, 3 toned hair, and a beautiful and mystical background! I loved this image so much that I framed it and added some flowers from my stash and added some dies (Fanciful Flourish by Cheery Lynn Designs) and presto a beautiful piece of work (I'm biased, of course ;)) that I can hang in my hobby room.

If you are a fan of Ching Chou Kuik's images you should most definitely check out the special she is running on her NEW images!


Thanks for stopping by today and I hope you have a wonderful rest of the weekend!


Wednesday, July 8, 2015

Crafty Gals Corner Challenge #27: Under the Sea + Mixed Media Tutorial

**PICTURE HEAVY**

HELLO FRIENDS!

So there's a great challenge going on over at Crafty Gals Corner! We have a challenge that begins every  WEDNESDAY! More often then not there are MULTIPLE SPONSORS PER WEEK! So there's plenty of chances to win! 

This week's challenge at Crafty Gals Corner is Under the Sea!


Prize: $20 Gift Certificate 

So - If you've been following me for a while you probably know that I have a serious obsession with the sea, mermaids, and nautical things. I chose to use this stunning image by Ching Chou Kuik called Deep Sea Siren. I really wanted to do something special with this image - so I decided to do a mixed media canvas. 

This was a LOT of fun but still kinda nerve wrecking because I'm VERY new to mixed media and still experimenting with things. I do, however, ABSOLUTELY LOVE HOW THIS CAME OUT! I hope you do too. I have a little picture tutorial of how this came to be as well. First though, I will show you the final result!


So how in the world did a blank canvas get to this point? Let me show you - It's extremely rare that I take pictures of my progressive journey through mixed media. I hope it inspires you to try it if you haven't yet!

Here are some of the supplies that I used - Gesso, Modeling Paste, Modge Podge, Paint Brushes, Acrylic Paints, STAMPlorations Stencils, Water Spray Bottle, Frame, Image by Ching Chou Kuik, 8x10 Canvas 

I also used - Inkdinkado Chalks, Sea Shells, Netting from the Sea Shells, Silver Glass Glitter, Frantage Powder, Pearls, Wild Orchid Crafts Flowers, Wild Orchid Crafts Pearls, Texture Brush

Colored Image - Deep Sea Siren by Ching Chou Kuik
Boy that Octopus was very interesting to color and I struggled for a while trying to figure out how exactly to do it. If anyone is interested I used the following Copic Markers:
Darkest to Lightest
E18, E19, YR18, YR16, Y38


I started out by coating the canvas in Gesso and the setting the image in the middle. I then lightly brushed over the edges of the images with the Gesso and let the whole thing dry. My next step was to coat the canvas in modeling paste. Yes- Modeling Paste is a little thick for this but it worked well for this project - not so much for stenciling though. I really need to try and find some texture paste or something that spreads a little easier. I then used the textured brush and dabbed it all over the canvas to create that effect.

I put the STAMPlorations stencil in the corner and brushed more modeling paste over it. I let it set for a few minuets and then used Turquoise acrylic paint and swirled it over the modeling paste and then removed the stencil and viola! 

I then took the same turquoise paint and mixed it with a little bit of Bahama blue and white so that it would lighten it up a bit. I used that mixture to paint the remainder of the canvas and very carefully painted it in between the dark turquoise "bubbles". It looked a little funny so I used some similar colored chalk and chalked all the way up to the edge of the image. 


I can't believe I've never seen or heard of Fran-tage powder until recently!! I don't know what rock I was under but this stuff is AWESOME. Well while googling this Frant-age powder I also found Silver Glass Glitter and got some of that as well. The Glass Glitter does NOT melt like the embossing powder, but if you combine them the glass glitter with the embossing powder it kinda sticks down. I did use Modge Podge as a base layer though.

\
A LONG time ago I bought decorative shells from Michaels and they came in this white netted bag. Well for whatever reason, at the time, I kept the netted bag and finally found the PERFECT use for it. I cut in half and tied a knot in it and used it on the bottom right corner. 

In conjunction with the netting I used Wild Orchid Crafts flowers and pearls to create this flower border.

Up close picture of the Glass Glitter and Fran-tage Powder

I picked up this little frame on clearance at Michaels at one point and it came in hand for this project. I glued some tiny little shells on it.

I used some of the bigger shells in the corner and used lots of texture paste to build up around it so I could stick the little frame there. 

Then final result is -


I really enjoyed creating this project and I hope you enjoyed the tutorial and a sneaky peek into my journey with this project. 

Thanks for stopping by today! Go ahead and head on over to Crafty Gals Corner, and join in on our challenge! You have until Tuesday at 12:00pm to enter!


I'd like to enter this project into the following challenges:

Crafting by Design - Recycle/Reuse (The netting was a packaging that held the shells I bought) - 7/13
Fab N Funky Challenges - Inspired by a Song ( Under the Sea - Little Mermaid) - 7/21
Inspiration Destination - Anything Goes - 7/13
Penny's Challenges - Anything Goes - 7/13
Clear it Out Challenges - Anything Goes - 7/12
Ike's World Challenge - Fantasy - 7/12
Paper Take Weekly - Anything Goes - 7/12
Through the Craft Room Door - Anything Goes - 7/13
Tip Top Tuesday - Summer Fun - 7/19
Anything But a Card - Anything Goes #49- 7/25
Come and Get it Challenges - Anything Goes with Flowers - 7/11
Crafting When We Can - Summer Fun - 7/17
Glitter N Sparkles - Anything Goes - 7/10
Sparkling Black Rose - Anything Goes with Non Cards - 
Lil Patch of Crafty Friends - Anything Goes - 7/17
That Crafty Place - Anything Goes with Mixed Media - 7/18
Crafting from the Heart - Anything Goes - 7/12
Craft Your Passion - Anything Goes - 7/12
Get Creative Challenges - Must Use Flowers - 7/12
Marker Pop - Anything Goes - 7/11
Not Just Cards - Anything Goes - 3.5 weeks
Oh La La Creations - All that Glitters - 7/18
Scrapbook Stamp Society - Anything Goes - 7/18
Sparkle and Sprinkle - Anything Goes with Embossing Powder - 7/25
Sparkle & Shine - Ching-Chou Kuik Challenge Blog - 7/31


Wednesday, May 27, 2015

Crafty Gals Corner Challenge #21: Critters

HELLO FRIENDS!
So there's a great challenge going on over at Crafty Gals Corner! We have a challenge that begins every  WEDNESDAY! More often then not there are MULTIPLE SPONSORS PER WEEK! So there's plenty of chances to win! 

This week's challenge at Crafty Gals Corner is Critters! Your project just has to feature an animal!

Our sponsor this week is:


Sweet Pea Stamps

Prize: $20 Gift Certificate

Here's what I came up with using The East Wind's image "Lucy Loo Bookaholic" What better way to feature a bookaholic than to put her on a book mark?!


Supplies used to make this card:
Brown, Patterned Cardstock - Stash
Heavenly White 80# Cardstock - Paper Temptress
* I do all my coloring on this!!*
Ribbon - Stash
Flowers - Stash
Button Brad - Spare parts
Book Mark - Silhouette Cut File
Spectrum Noir Markers
Hair - Copic Markers

Thanks for stopping by today! Go ahead and head on over to Crafty Gals Corner, and join in on our challenge! You have until Tuesday at 12:00pm to enter!

Saturday, April 25, 2015

Sassy Studio Designs: April New Release!

Happy Saturday! 

So you know those teasers I've been slowly releasing all week?! It's all been counting down to today, which is the NEW RELEASE DAY at Sassy Studio Designs!


So I actually loved this release so much that I did TWO projects for this release. Here they are:

This one features the NEW Cleopatra Portrait Image and 2 of the fabulous Sentimints!


The following items were used to create this card:
Black Cardstock - Stash
Gold Cardstock - Recollections
Heavenly White 80# Cardstock - The Paper Temptress
*I do ALL my coloring on this - it's AMAZING*
Blue Background - Sail Boat Blue, Silver, & Stream Alcohol Inks
For the "stars" - White Paint Pen
Egyptian Images - Silhouette Cut Files
Square Fleur de Lis Die Cut - Spellbinders 
Gelly Roll Star Dust Pen
Spectrum Noir Markers 

--------------------------------------------------------------------------------------------------------------------------


The following items were used to create this Shadow Box:
White, Brown, Green Cardstock - Stash
Heavenly White 80# Cardstock - The Paper Temptress
*I do ALL my coloring on this - it's AMAZING*
Grass - Cottage Cutz
Poodle - Eiffel Tower, Lamp, & Poodle - Cottage Cutz
Clouds (mask) - Silhouette Cut File
Blue Birds - Silhouette Cut File
Kite - Silhouette Cut File
3-D Shadow Box - Silhouette Cut File
Sky Blue - Memento Ink
Sponge Dauber 
Spectrum Noir Markers


So if you saw on the main blog, we have implemented a NEW prize system! You actually have 24 chances to win an image from the new release! How awesome is that?! Here's how:

1) Teaser posts - for each day there is a teaser, ONE correct GUESSER will win that image for that day

2)  As you're hopping along, be sure to comment on each Design Team member's post.  At the end of the hop, ONE COMMENTER from EACH DT BLOG will win the image that that DT member used.  The more you comment, the more chances you  have to win!!!! And since its a brand new, BIG team this term, you have 19 chances!! Since I used 2 images, I'll let the winner decided which image they'd like. 

Please hop along and see what the other DT member's have created for this amazing release!

SSD: http://sassystudiodesigns.blogspot.com/
Greg - http://latestwhims.blogspot.com/
Carrie - http://carrieshandmadecards.blogspot.co.uk/
Kitty – http://intruderlady.blogspot.com
Chris - http://cattsscratchingpost.blogspot.ca/
Kim -http://itsallaboutcrafting.blogspot.com/
You are here>>>>>Samantha – http://designsbysammy.blogspot.co.uk/<<<<<<<
Valerie - http://lafeerieduscrap.blogspot.com/
Sara P- http://sarascreativeadventures.blogspot.com/
Debbie – http://www.craftingwhenican.blogspot.com/
Judy - http://jvzcreations.blogspot.com/
Tanya - http://little-scrapper.blogspot.com/?hc_location=ufi
Rachelle – http://www.imblackmartha.blogspot.com/
Julie R – http://pumpkinbellycards.blogspot.co.uk/
Kel – http://scrap-photograffs.com/
Cindy - http://cre8ivecindy.blogspot.com/
Jo D – http://www.helpyoufindit.blogspot.co.uk/
Vanessa - http://www.saffiresstamping.blogspot.com/
Julie Ann –  http://handcraftedbycharliesnanny.blogspot.com/
SSD Store http://buysassystudiodesigns.blogspot.com/


Also be sure to join us for the Party Chat from 6:00pm - 8:00pm PST!


Need to know what time to join in if your on the other side of the world? Use this link!

Thanks for joining me today! I hope to talk to you later at our party chat!


Thursday, April 9, 2015

Karleigh Sue Inspirational Post - Anything but a Card

Hello, Hello!

It's my turn to share an inspirational post with you! If you check out the Karleigh Sue Challenges, you will see that today I'm providing the Inspirational Post!

It's my job to get your mojo flowing for a our monthly project that you can link up over at Karleigh Sue.For this months inspirational post, I decided to use the image called "Rainy Days". Remember the theme for this challenge is to do anything BUT a card.

I hope that you will take a look at the Karleigh Sue Digi Store and try your hand at any one of these adorable little images. 


The following supplies were used to make this card:
Mixture of Acrylic Paints
Glossy Accents (for the Rain Drops)
Stardust Pen - Gelly Roll
Circle Dot Words - Paper Studio
Tim Holtz Stencil
Spectrum Noir Markers

Thank you so much for stopping by! Go and head on over to the Karleigh Sue Challenges and link up for you chance to win FREE images!


Wednesday, April 1, 2015

Karleigh Sue: Cutie's Challenge - Anything BUT a Card

Hello there friends!
It's the first of April which means it's time for another challenge at Karleigh Sue Challenges!
Challenge Blog
So, just to recap
- The first of every month are the regular challenges. 

- Then, on the 15th of every month, there is a challenge so spicy it'll make your eyes POP! Yup, that's right, those are the Sexy Challenges. 

On to this month's challenge!

ANYTHING BUT A CARD

I used the very adorable image: Take Time to Smell the Flowers
This week I decided to make a cute little Sticky Note cover because I always seem to have these tiny little sticky note pads everywhere. This helps me gather them all and put them in one place. :)


The following items were used to create this project:
Patterned Cardstock - Stash
Heavenly White 80# Cardstock - Paper Temptress
*I do all my marker coloring on this! It's fantastic!*
Note pad cover - Silhouette Cut File

Stay tuned for a spicy, sexy, challenge debuting on the 15th! I will also have a mid-month inspiration coming to you soon!


Monday, July 9, 2012

My Newest Cards!

I realize that I haven't been on here in a little over a month! Things have been slightly hectic in my life right now, including a 1500 mile move across the country. My husband and I have relocated from California to the great state of Texas. :)

Below are some of my most recent cards. Enjoy and comment on what you like.
Thank you for stopping by!


This card was made for a family friend who just graduated high school. I used the Teen Scene Cart. for this card and I'm pretty pleased with the way it came out.


Like most boys - my nephew is obsessed with video games, so for his birthday I couldn't think of a better way to make his birthday card :)


This is a male birthday card.


I absolutely love this stamp! I got it from Hobby Lobby on clearance. It's just to adorable - I made an anniversary card out of it.

As I stated earlier in my post - the hubby and I just moved to Texas. So I made these cute cards with our new address to send to family and friends.


I actually was inspired for this card from my mother. Lena Fonkert.


This is from the Cricut Imagine Cart. Yummy. I thought it was cute and made an anniversary card out of these little characters.

These little baby onsies - I also got the idea from my mom, as well as the card below.


The three pictures above came from the Wild Card Cart.


Oh who wouldn't love to be sitting on a beach right about now? This card was for my sister in law.


Manly card.

Thanks for stopping by!! :)